Introduction
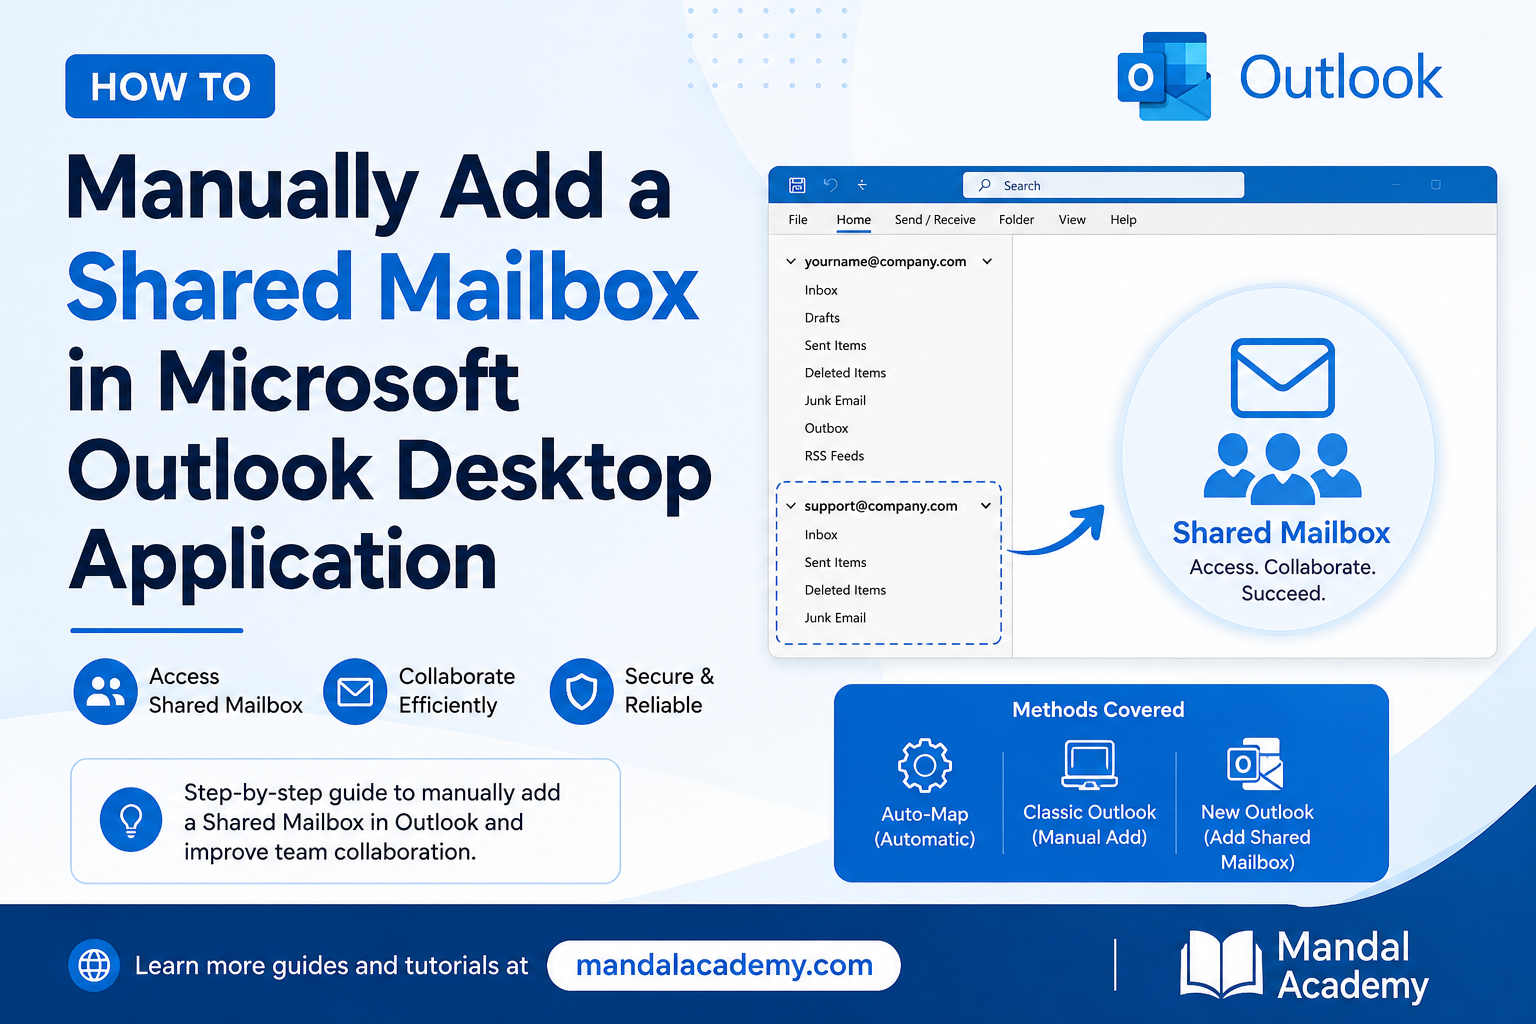
A Shared Mailbox in Microsoft 365 allows multiple users to access and manage a common mailbox, making it easier for teams to collaborate and handle emails from a shared address such as testshared@mandalacademy.com.
In most cases, a Shared Mailbox is automatically added to Outlook after permissions are assigned (Auto-maping) . However, if the mailbox does not appear automatically, users can manually add it to Outlook. This guide explains how to add a Shared Mailbox in both Classic Outlook and New Outlook.
Prerequisites
Before you begin, ensure the following requirements are met:
-
You have Full Access permission to the Shared Mailbox.
-
Microsoft Outlook Desktop Application is installed on your computer.
-
Outlook is configured and connected to Microsoft 365 / Exchange Online.
-
You have a stable internet connection.
Method 1: Shared Mailbox Automatically Appears in Outlook
When Auto-Mapping is enabled, Outlook automatically adds the Shared Mailbox after access permissions are granted. Automaping will be done from Exchange Admin side.
Steps
-
Close Microsoft Outlook.
-
Wait for mailbox permissions to synchronize.
-
Reopen Outlook.
-
Check the left navigation pane.
-
Verify that the Shared Mailbox appears below your primary mailbox.
Note
Permission synchronization may take some time. In some environments, it can take several minutes or longer before the mailbox becomes visible.
Method 2: Manually Add a Shared Mailbox in Classic Outlook
If the Shared Mailbox does not appear automatically, follow these steps to add it manually.
Steps
-
Open Microsoft Outlook.
-
Click File.
-
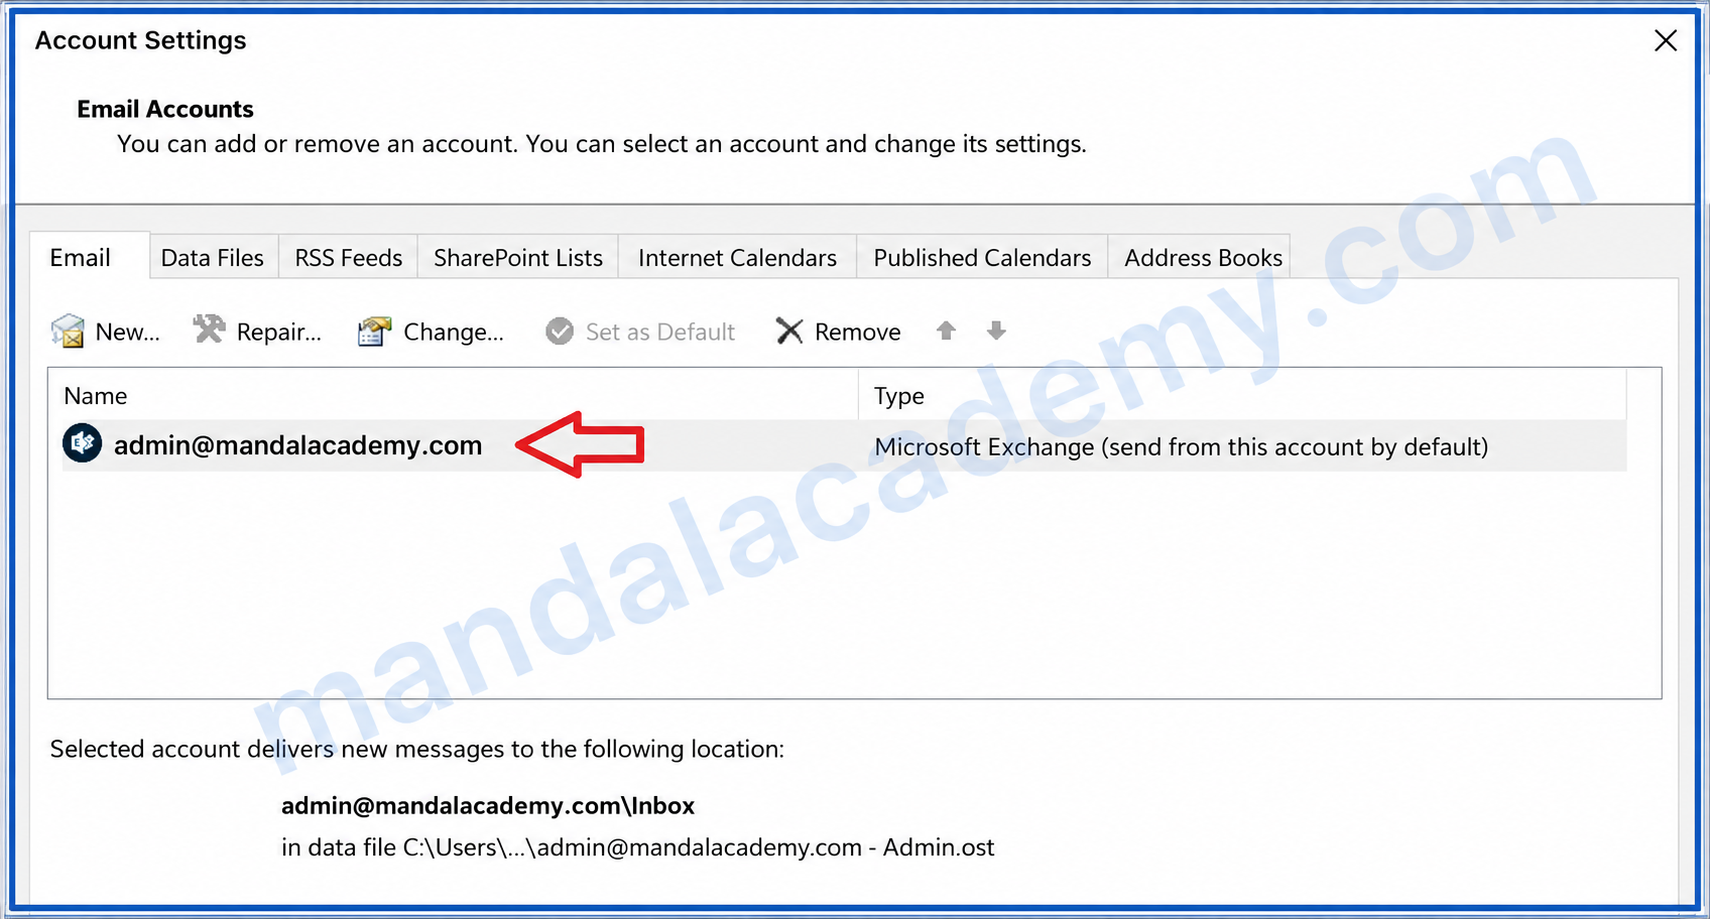
Select Account Settings > Account Settings.
-
Select your primary Exchange account.
-
Click Change.
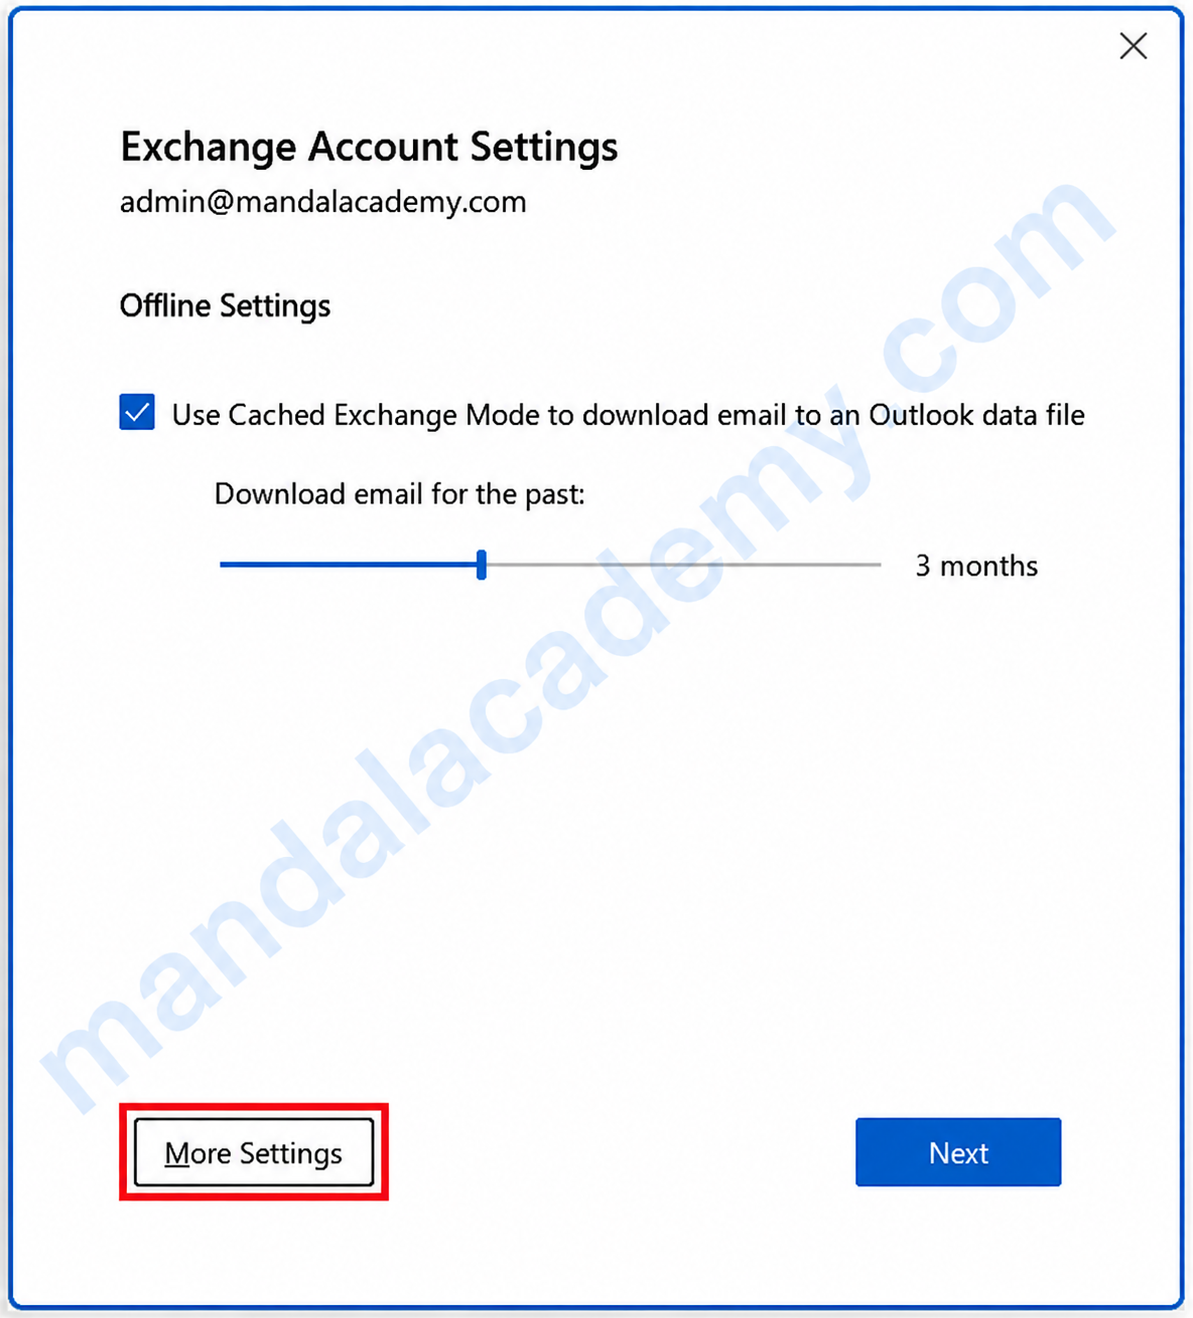
6. Select More Settings.
7. Open the Advanced tab.
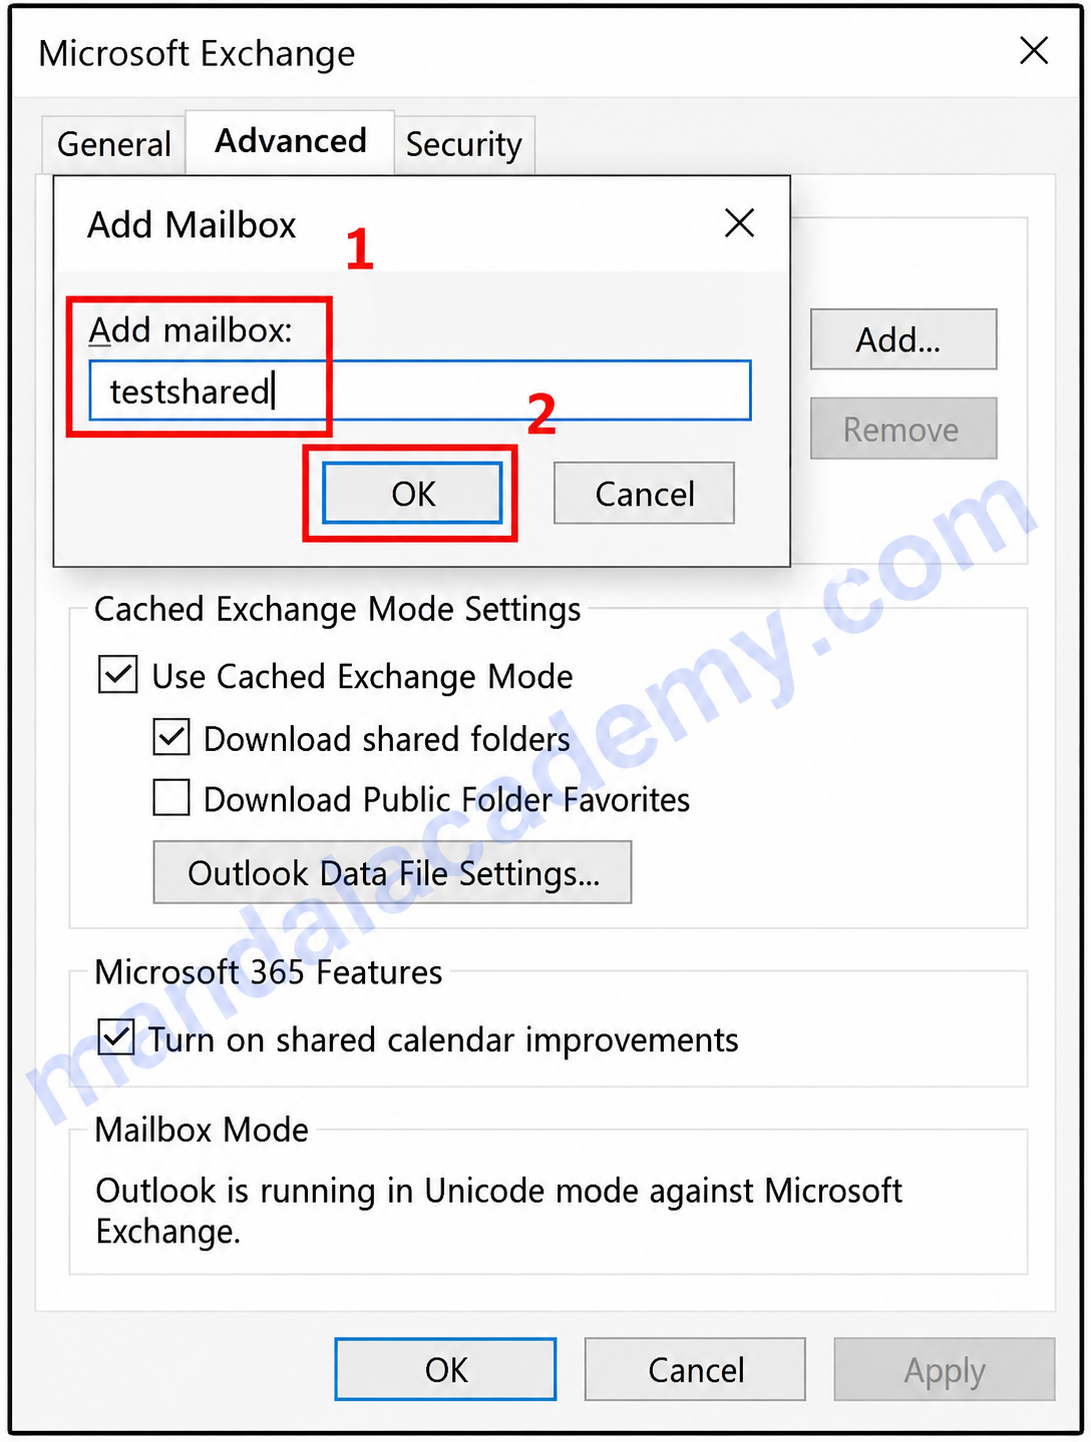
8. Under the Mailboxes section, click Add.
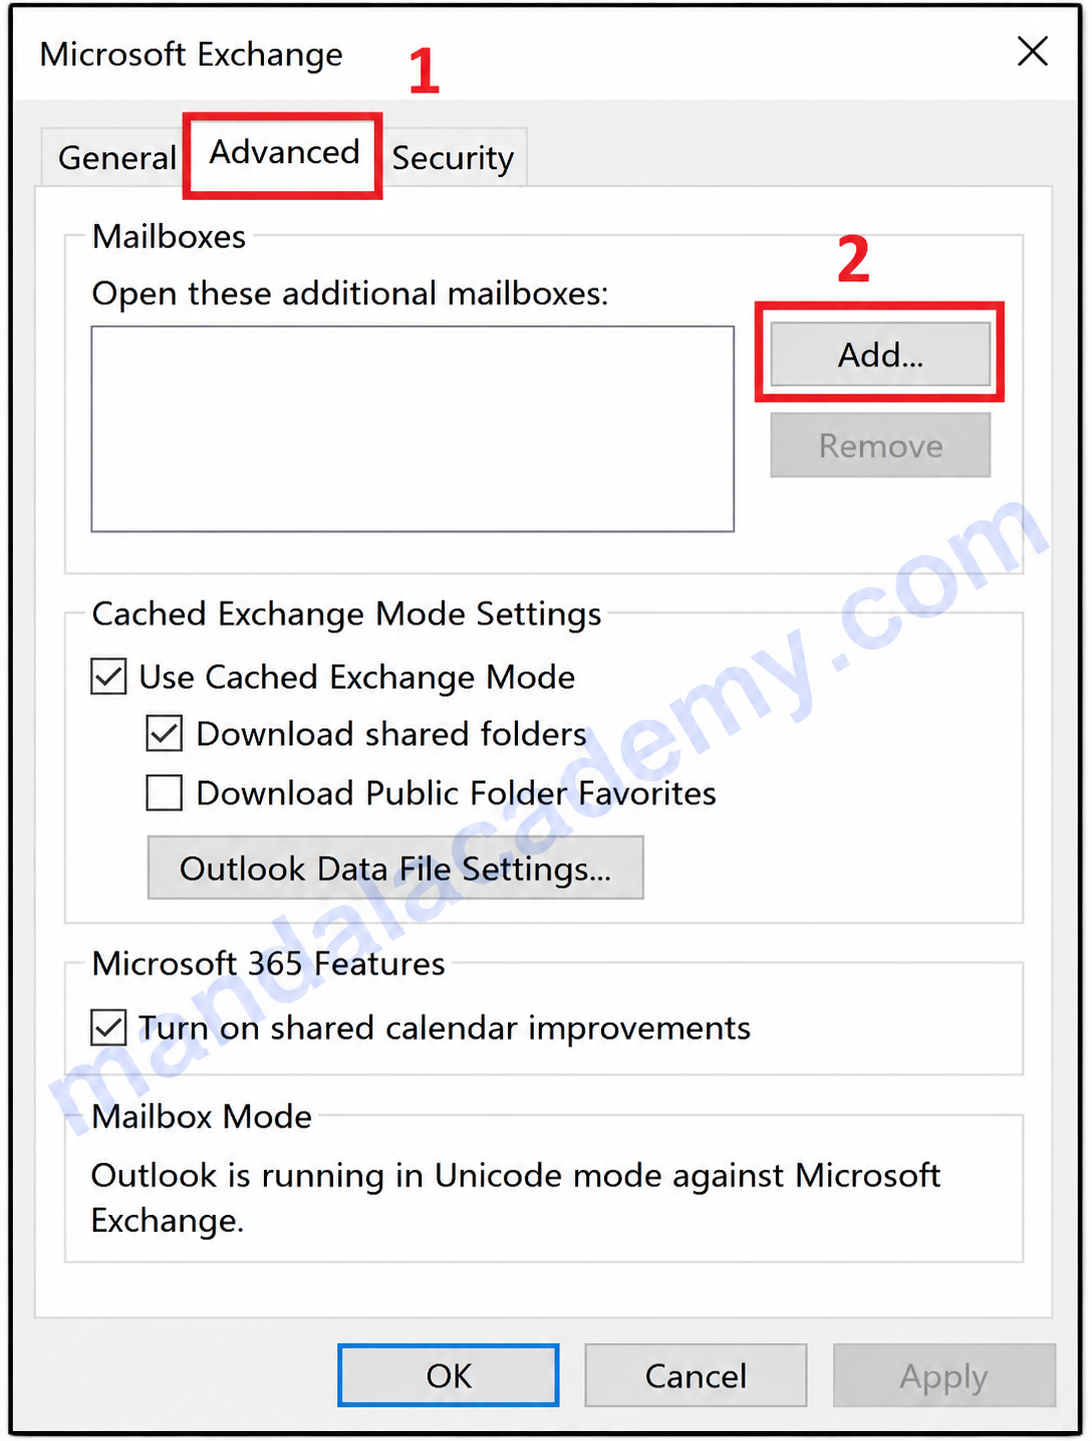
9. Enter the Shared Mailbox name or email address.
10. Click OK.
11. Click Apply, then OK.
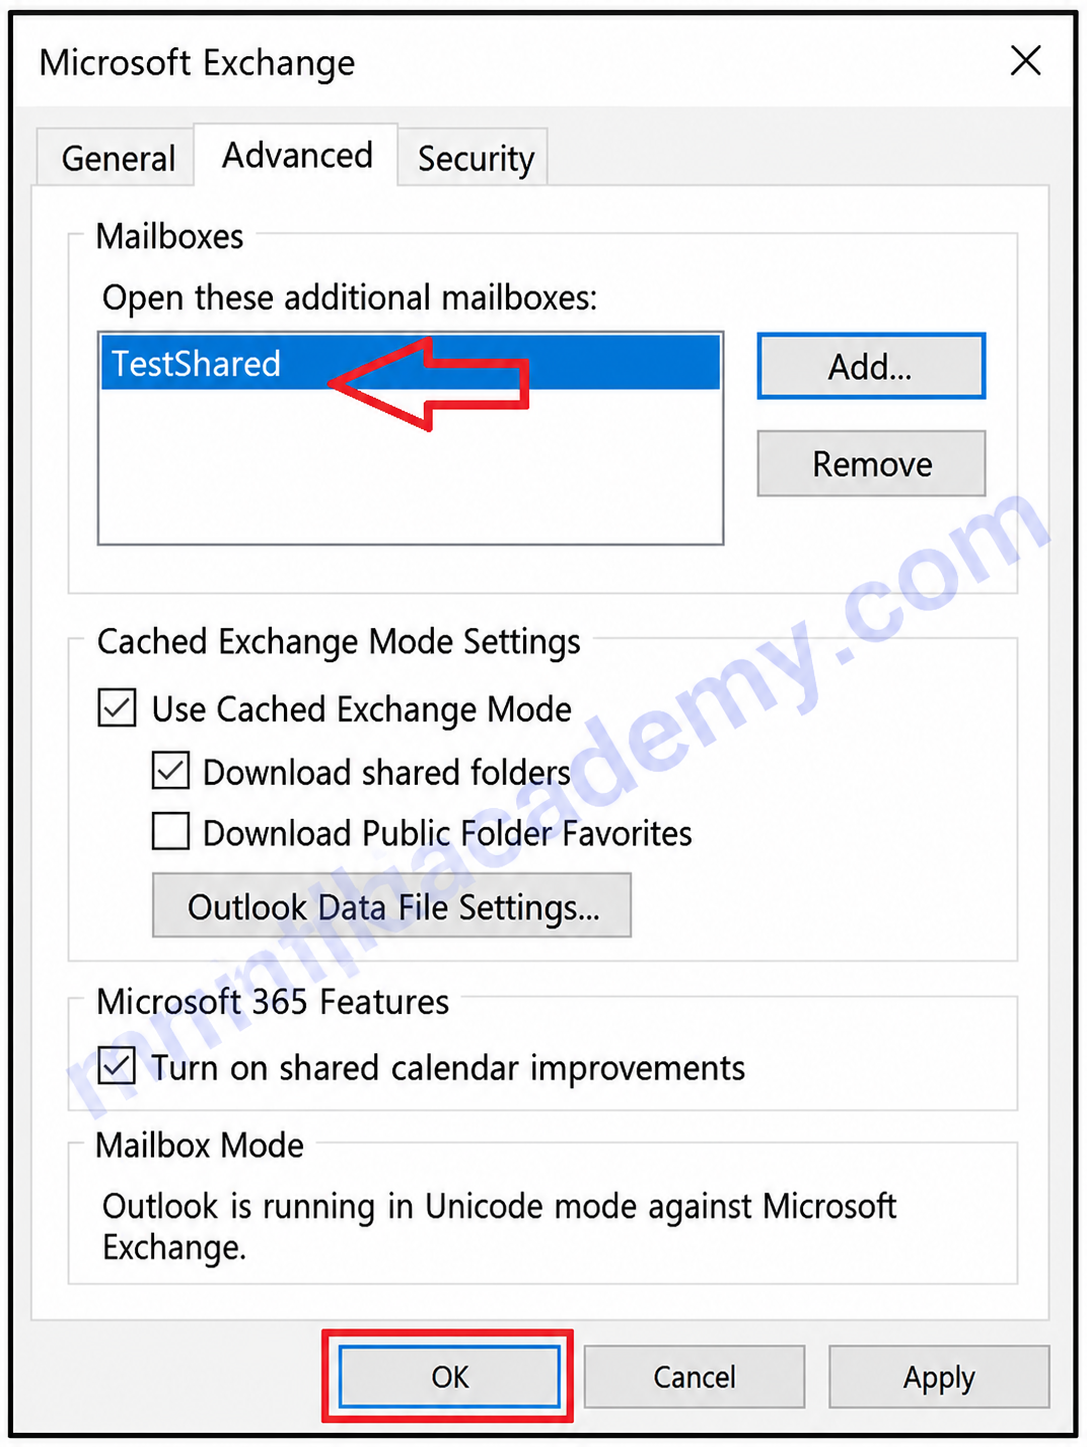
12. Restart Outlook.
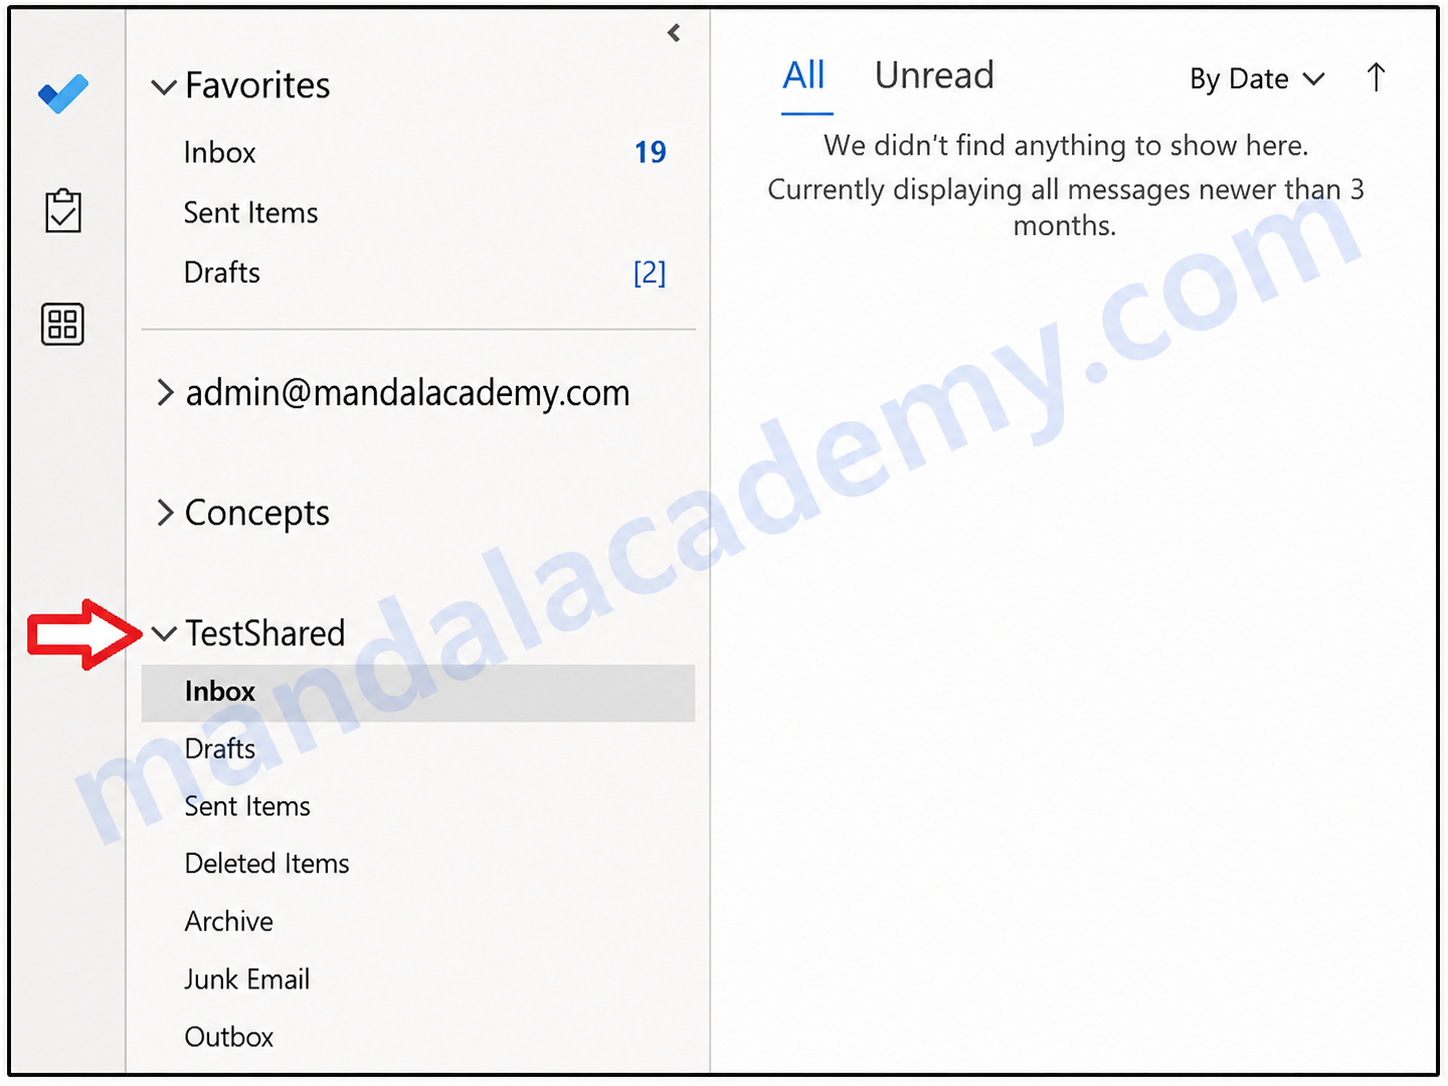
After Outlook restarts, the Shared Mailbox should appear in the folder pane.
Method 3: Add a Shared Mailbox in New Outlook and OWA (Outlook Web Application)
If you are using the New Outlook experience or want to add it in OWA, use the following steps.
Steps
-
Open New Outlook.
-
In the folder pane, right-click your mailbox name.
-
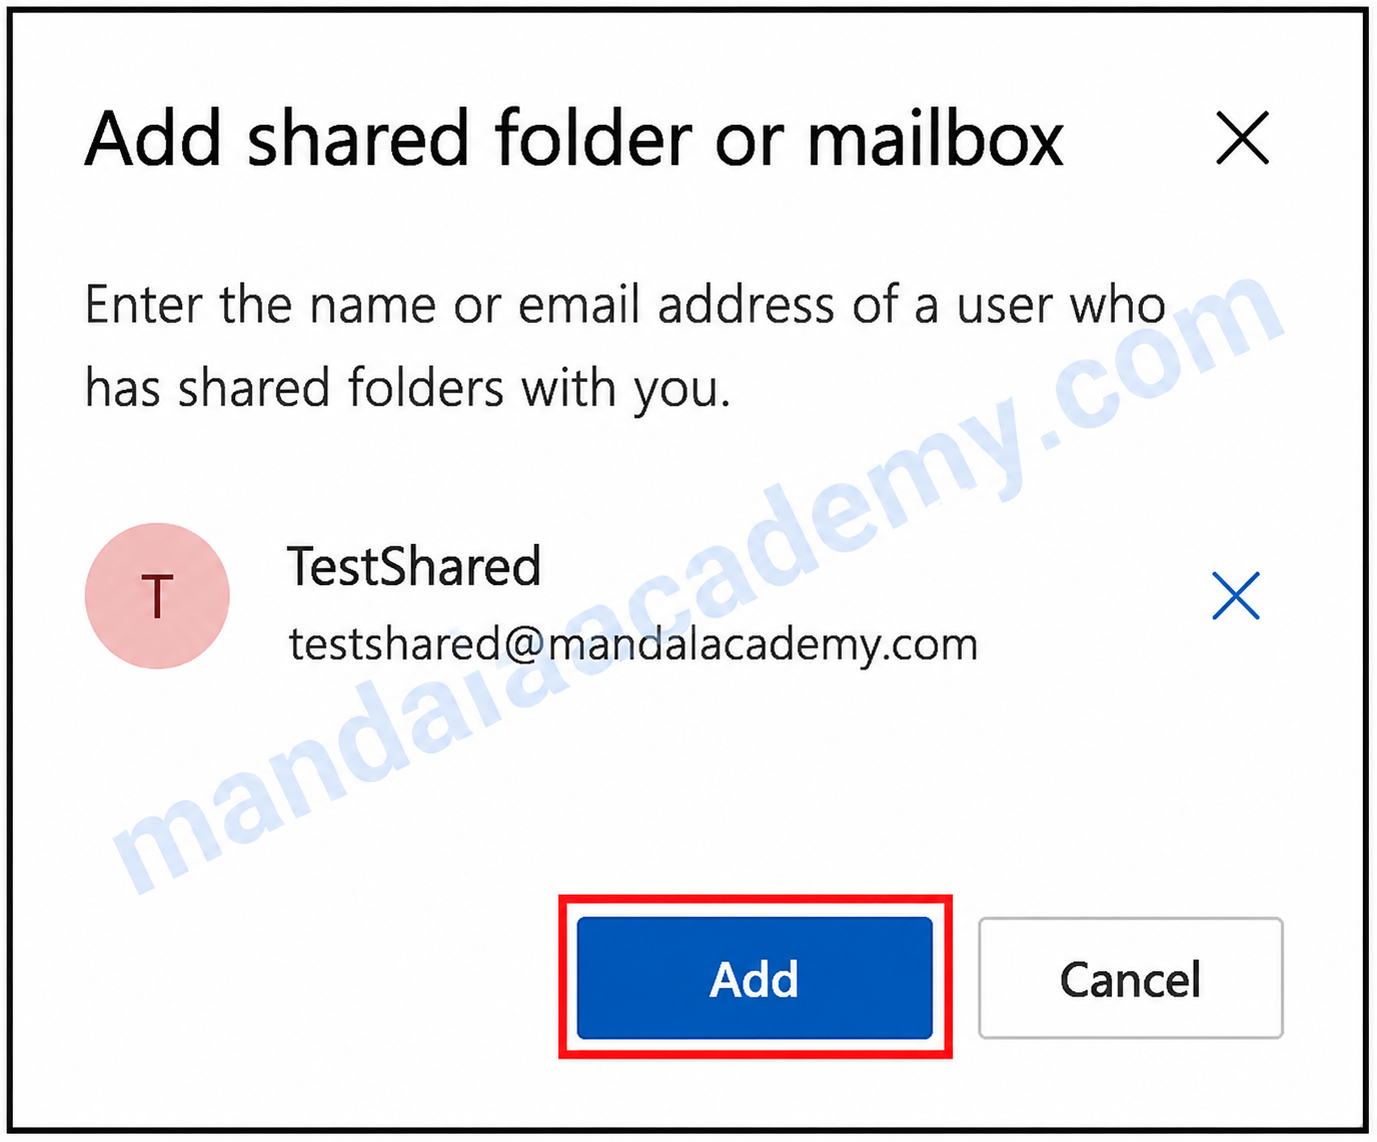
Select Add Shared Folder or Mailbox.
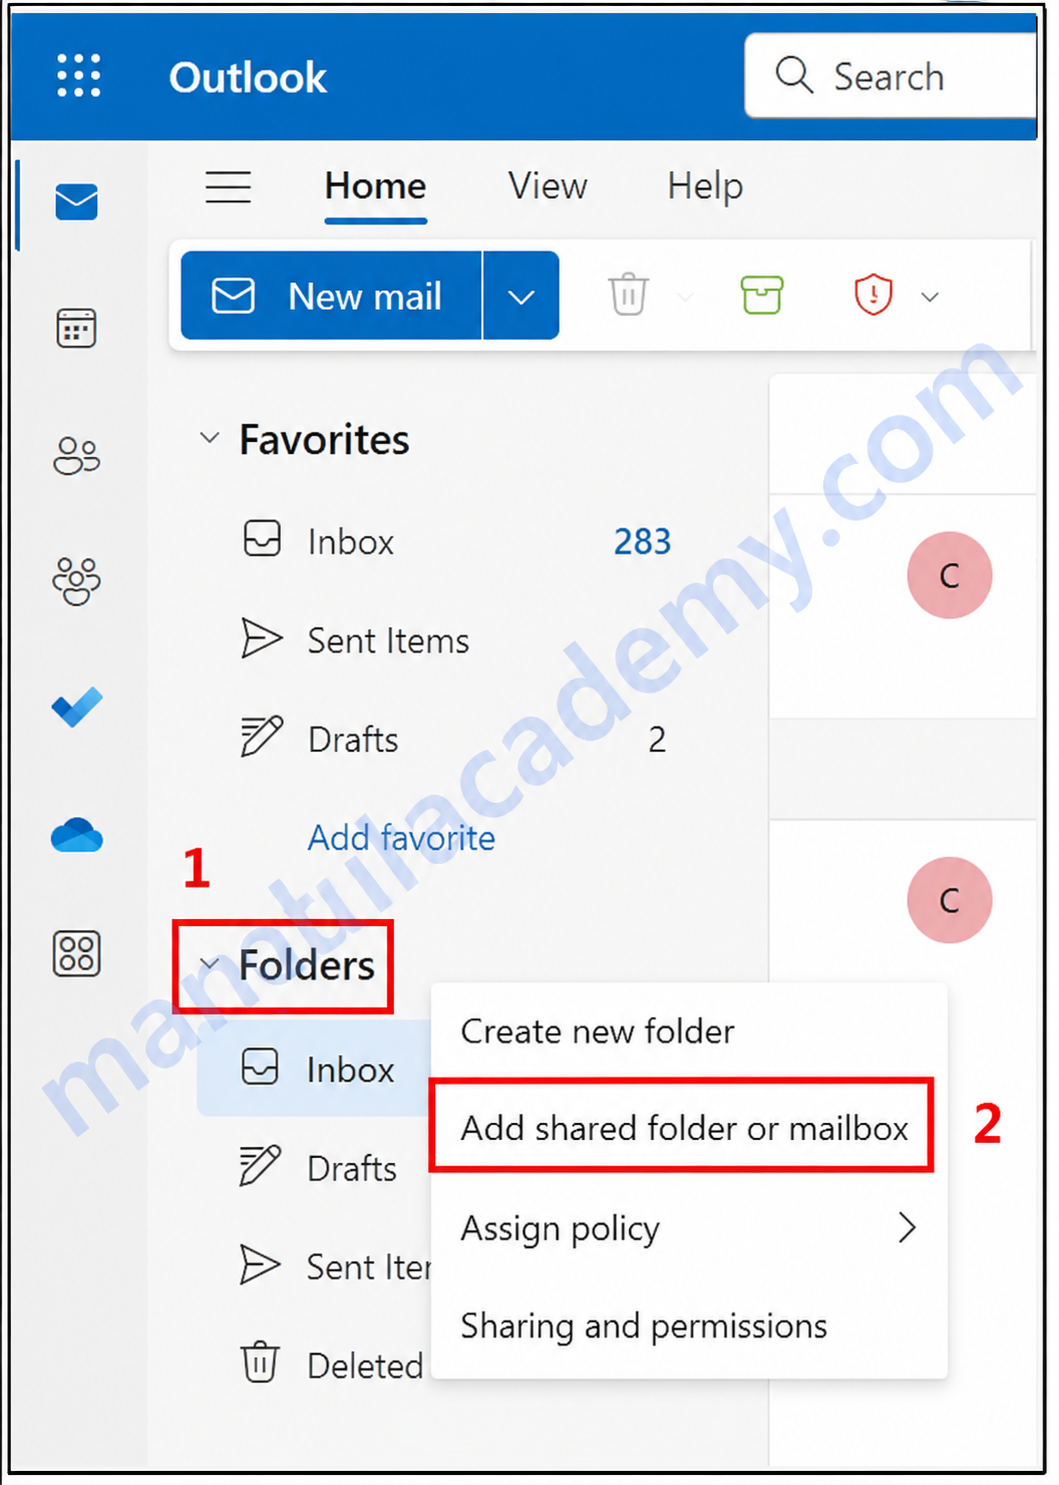
4. Enter the Shared Mailbox email address.
5. Click Add.
The Shared Mailbox will appear under the Shared with Me section.
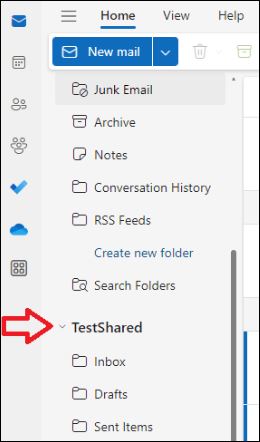
Verify Shared Mailbox Access
After adding the mailbox, perform the following checks:
-
Confirm the Shared Mailbox is visible in Outlook.
-
Open the Shared Mailbox Inbox.
-
Verify that folders such as Inbox, Sent Items, and Deleted Items are accessible.
-
Send a test email using the Shared Mailbox address in the From field.
-
Confirm that the email is sent successfully.
Troubleshooting
Shared Mailbox Not Visible
If the mailbox does not appear:
-
Confirm that Full Access permission has been assigned.
-
Close and reopen Outlook.
-
Restart your computer.
-
Manually add the mailbox using Method 2.
-
Create a new Outlook profile if necessary.
-
Allow additional time for permission synchronization.
Access Denied Error
If you receive an Access Denied message:
-
Verify that you have Full Access permission to the Shared Mailbox.
-
Confirm your Microsoft 365 account is active and licensed.
-
Sign out and sign back into Outlook.
-
Contact your IT Administrator if the issue persists.
Conclusion
Adding a Shared Mailbox in Outlook enables team members to access and manage shared communications efficiently. While most Shared Mailboxes are automatically added through Auto-Mapping, users can manually add them when required using either Classic Outlook or New Outlook. Following the steps in this guide will help ensure seamless access to Shared Mailboxes in Microsoft 365 and Exchange Online environments.
Comments (0)
No comments yet. Be the first to leave one!